Synchronization settings differ for individual versions of Mac OS X:
Synchronization of contacts can be set in . To enable synchronization, use the Synchronize with Exchange option on the General tab (see figure 11.2 Enabling synchronization).
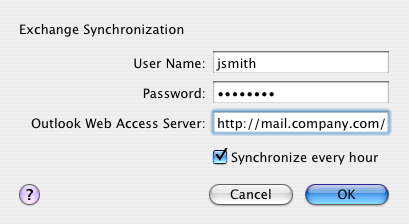
Check the option Synchronize with Exchange to enable synchronization. Click to open an advanced settings dialog (see figure 11.3 Synchronization setup):
- User Name, Password
Username and password for the corresponding account. If your mailbox is not created in the primary domain, it is necessary to enter username including the domain (see tables 11.1 Example of the dialog for a primary domain user and 11.2 Example of the dialog for a non-primary domain user), following this pattern:
user_domain@domainFor example:
dsutterland@company.comAsk your network administrator whether your user account is saved in the primary domain or not.
- Outlook Web Access Server
Synchronization is performed via the WebDAV interface. Therefore, it is necessary to specify this entry by the full path to the corresponding account in the following form:
http://mail.company.com/exchange/jsmith- Synchronize every hour
If this option is checked, synchronization is performed once an hour.
Examples:
| Items included: | What to fill in: | Example: |
|---|---|---|
| User Name | username | wsmith |
| Password | user password | KvB125Vg |
| Outlook Web Access Server | URL following this pattern:
| http://mail.company.com/exchange/jsmith
|
Table 11.1. Example of the dialog for a primary domain user
| Items included: | What to fill in: | Example: |
|---|---|---|
| User Name | username including the domain | eblue@company.com |
| Password | user password | AhdeeB56 |
| Outlook Web Access Server | URL following this pattern:
| http://mail.company.com/exchange/hbrown
|
Table 11.2. Example of the dialog for a non-primary domain user
The synchronization uses Apple iSync. This application enables synchronization on various Mac OS X systems. In this application, synchronization can be started by hand any time (unless the every hour synchronization mode is set in the Apple Address Book).
Follow these instructions:
Set Apple Address Book correctly (see above).
Run the Apple iSync application
A dialog box with the Exchange icon is displayed. The window also includes the button.
Click to synchronize contacts.
For Mac OS X 10.4 Tiger and Mac OS X 10.5 Leopard, two methods of synchronization are possible:
For the synchronization settings, the built-in support for connection to the Microsoft Exchange server will be used and the synchronization is performed with the Apple iSync application.
Synchronization can be set by the Kerio Sync Connector, a special application designed for data synchronization in Apple Address Book and Apple iCal. In detail, Kerio Sync Connector is described in chapter 12 Kerio Sync Connector for Mac.
Warning
It is not possible to set synchronization both in Apple Address Book and in the Kerio Sync Connector. Only one synchronization method can be used at a time.
Synchronization inApple Address Book can be set as follows:
Run Address Book.
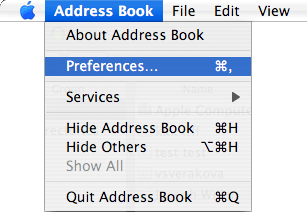
In (see figure 11.4 Address Book → Preferences) on the General tab, check the Synchronize with Exchange option (figure 11.5 Apple Address Book — General).
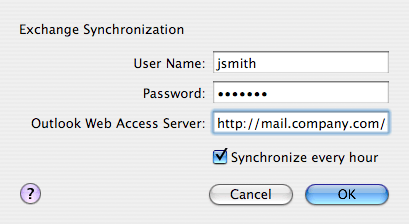
Click on and enter username and password for connection to an account in Kerio Connect (see figure 11.6 Login data settings):
- User Name, Password
Specify login username and password for connection to a Kerio Connect account. If your mailbox is not created in the primary domain, it is necessary to enter username including the domain (see tables 11.1 Example of the dialog for a primary domain user and 11.2 Example of the dialog for a non-primary domain user), following this pattern:
user_domain@domainFor example:
dsutterland@company.comAsk your network administrator whether your user account is created in the primary domain or not.
- Outlook Web Access Server
It is necessary to specify this entry by the full path to the corresponding account in the following form:
http://server_name/exchange/user_namefor example:
http://mail.company.com/exchange/jsmith- Synchronize every hour
If this option is checked, synchronization of contacts is performed once an hour.
Once the connection to the server is set, it is necessary to configure Apple iSync, the synchronization utility which allows synchronization of various types of applications and devices on Mac OS X. This setting allows manual synchronization of contacts.
The settings can be done as follows:
Run the Apple iSync application
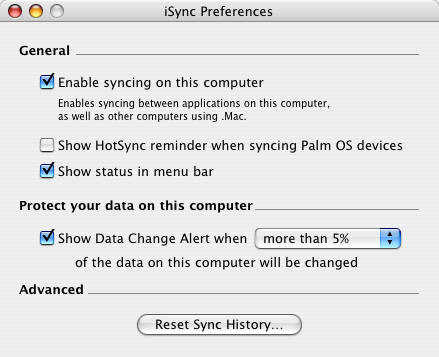
In the iSync menu, click on Preferences.
In the iSync Preferences dialog box, check the Show status in menu bar option (see figure 11.7 iSync Preferences).
Now, it is possible to synchronize Apple Address Book whenever needed. A synchronization icon appears in the right top corner of the screen. Click this icon and select Sync Now in the menu (see figure 11.8 Starting synchronization).
On Mac OS X 10.6 Snow Leopard, you can synchronize Apple Address Book contacts either with Kerio Sync Connector or via the native protocol CardDAV.
In this product, Kerio Technologies features Auto-configure Address Book, a special tool for automatic configuration of CardDAV accounts. This implies that now you simply download and run this tool on your computer.
The only information required for the installation is as follows:
username and password for the corresponding account,
username and password for an account with administration rights for the workstation.
Warning
If you have installed and configured the latest version of Kerio Sync Connector, synchronization of contacts over Kerio Sync Connector is stopped automatically upon setting a CardDAV account.
However, it is recommended to uninstall Kerio Sync Connector before running the autoconfig tool.
To run the autoconfig file, follow these instructions:
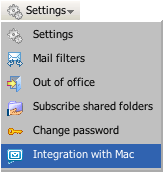
The tool can be downloaded from the special page Integration with Mac OS X. To open this page, go to the Kerio WebMail interface's (see figure 11.9 Kerio WebMail — Settings).
Note
For detailed instructions on authentication to Kerio WebMail, refer to chapter 1.2 Authentication to Kerio WebMail.
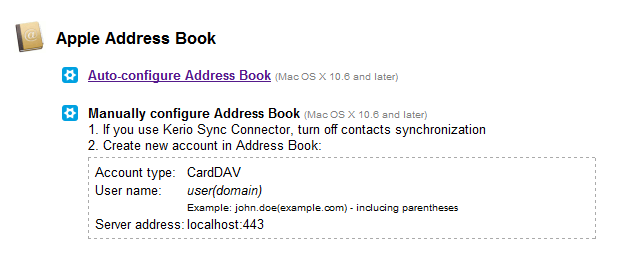
On the Integration with Mac OS X page just opened (see figure 11.10 Integration with Mac OS X), click on the Auto-configure Address Book link.
Warning
The autoconfiguration tool must be downloaded from the server of the name for which the SSL certificate is issued.
If you are not sure about this issue, download a new certificate from the integration page first and then install the autoconfig file for Apple Address Book.
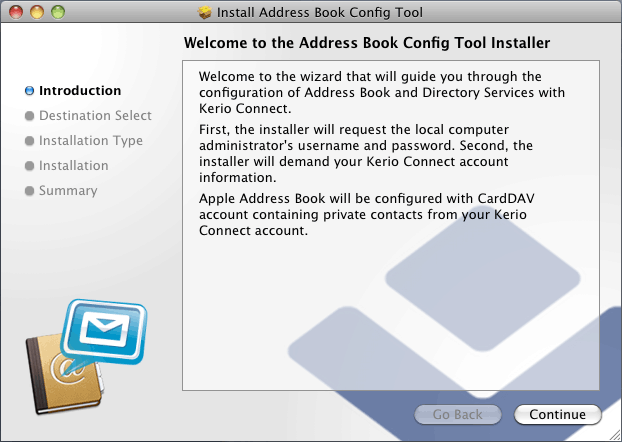
The tool gets downloaded to your workstation and gets launched automatically (see figure 11.11 Starting the Auto-configure Address Book tool). Click on .
In the next page, select location where the tool will be saved and where it will be launched from.
Unless motivated by specific reasons, do not change the default settings and click on .
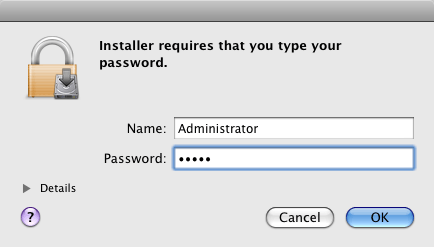
Now enter username and password of an administration account for your computer (see figure 11.12 Entering administration username and password).
Then specify login username and password for connection to a Kerio Connect account.
After finishing the process in the wizard, contact synchronization via CardDAV will be ready to use.
Warning
The Auto-configure Address Book tool can be also used for synchronization of shared contacts.
However, if a user shares any of their contact folders after the autoconfig tool is used, it is necessary to run the Auto-configure Address Book operation again to involve the newly shared contacts in your synchronization.
You can set up CardDAV account automatically by following these steps:
If you use Kerio Sync Connector, disable contact synchronization.
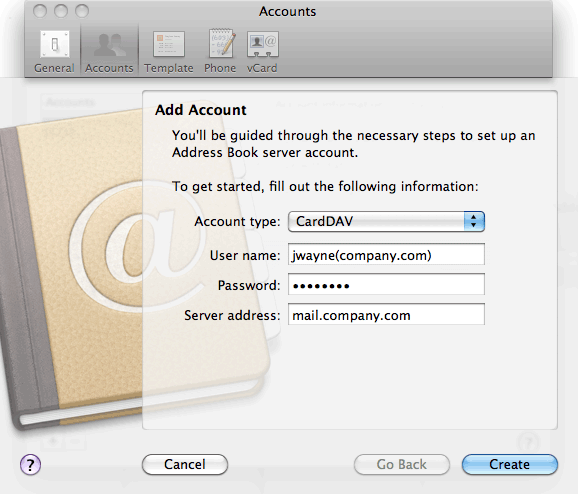
In Address Book create a new account with the following parameters (see figure 11.13 CardDAV account settings):
Account type — CardDAV
Username — user(domain)
Warning
Username and domain must include the parenthesis. Example:
jsmith(company.com)If the user belongs to the primary domain, you can use username without domain.
Server address — enter the server address
Confirm by clicking on .

