In the simplified version of Kerio WebMail, it is possible to handle the email in a similar way as in the full version. The mail folders are arranged in a table (list). Each row contains one message and available information. The columns contain information to individual messages and actions that are available for the messages.
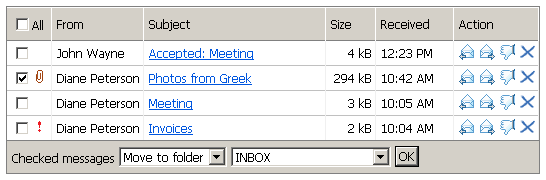
You can mark individual messages by clicking the checkbox at the beginning of each row. If you want to check all messages in the list, click the All checkbox. When multiple messages are checked, you can perform various operations with all the messages at once. After checking the messages, select any from the operations in the Checked messages menu to apply it to the selected messages.
The Checked messages menu contains standard actions that can be performed with selected messages:
- Move to folder
The messages will be moved to a selected folder. Click to confirm the action.
- Copy to folder
The messages will be copied to a selected folder. Click to confirm the action.
- Clear
Selected messages will be removed or moved to Deleted Items, depending on setting of the Delete messages permanently option (for details, see section 2.5 User Settings).
- Mark as read
The messages will be marked as read by default.
- Mark as unread
The messages will be marked as unread by default.
- Set flag
The flag will be added to message(s). For details about the message flag and its usage, see chapter 1.6.2 Message reading.
- Delete flag
The flag will be deleted. For details about the message flag and its usage, see chapter 1.6.2 Message reading.
- Forward
The selected messages will be forwarded as attachments. To forward only one message in the email body, use the appropriate action for this message in the message list.
Warning
The actions in the menu depend on access rights settings for the displayed folder (for more information about the access rights to folders, see chapter 1.12 Folder Administration). This means that read-only public and subscribe folders cannot be removed or edited. Therefore, these options are not included in the menu.
When performing an action for one message only, you can click some of the icons in the Action column in the message list. The Action column allows various options of how to handle the message such as replying, forwarding (in a message body), removal or marking the message as spam.
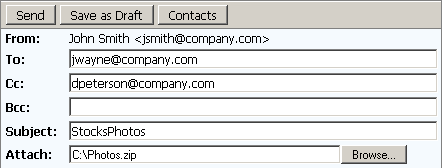
The mail editor looks like a web form and contains all the functions necessary for sending a message.
The form is divided into two parts. In the first one (called message header), This part is called message header. In the other part, you can write the text of the message and append an attachment. This part is called body.
The header contains the following fields:
- From
The address that is displayed to the recipient as the address of the sender.
- To
Enter the email address of the recipient in this field. More than one email address is allowed; the addresses must be separated by commas (see the figure).
- Cc
The same function as the To field. Use this field when you just want to keep the recipient informed and do not need him to reply to the message.
- Bcc
The address entered in this field is hidden for the other recipients. Blind copy is useful especially when a message is to be sent to more email addresses and you want to protect the privacy of one or more users.
- Subject
A brief description of the message contents.
The message body consists of the text and attachments (if any).
The form header includes various buttons allowing basic operations with the message:
- Send
The message will be sent to the addresses entered into the To, Cc and Bcc fields.
- Save as Draft
The message will be moved to the Drafts folder, where it can be opened, edited and sent.
- Contacts
Use the button to search for a contact address and to add it to a corresponding field (To:, Cc: or Bcc:). Only the standard contacts folder and the standard public contacts folder are searched through.
- Attach
Use this button to attach a file to a message. At maximum, three files can be attached. After its first use, the button is hidden. You cannot append more than 3 files at once to one message.
TIP
To attach more than three files, the following trick can be used:
Attach the first three files and save the message as a draft.
Open the message draft and attach other files (three attachments can be added at one turn).
Warning
Each attachment appended must not exceed the limit set by the administrator in Kerio Connect, Otherwise, the particular message will not be delivered.
New messages are delivered to the INBOX folder by default (folders for incoming messages can be specified in the rules— see chapter 1.14 Message filtering). The unread messages are marked in bold. The number of unread messages is indicated in parentheses next to the folder name.
Click the message subject to view the selected message. Message header as well as body are shown on the page. There are also several buttons to perform various actions with the message:
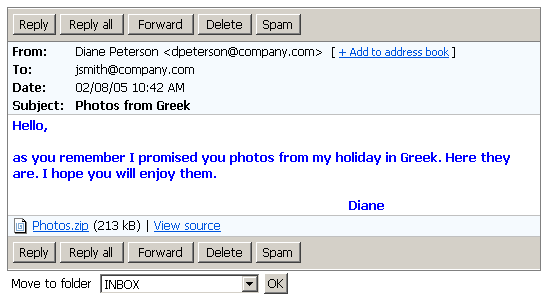
- Reply
To reply to the message you received, click the button and edit the message in the editbox. The email address of the person who has sent the original message is entered automatically in the To field.
- Reply all
The Reply all button works similarly to the Reply option, but your answer is sent not only to the author of the message, but also to all recipients (except you).
- Forward
Use the button to open the dialog for forwarding a message; the To and Cc fields are left blank, because the system does not know who do you intend to forward the message to.
- Clear
Use this button to either delete the selected message or move it to the Deleted items folder. This option depends on Kerio WebMail Mini configuration (see chapter 2.5 User Settings).
After the message is deleted, the next message in the list is displayed (in the descending order). If the deleted message was the last one in the list, previous message is displayed.
TIP
When you press the button together with the Shift key, you will return back to the message list.
- Spam/Not spam
Marks message as spam or non-spam. For more information about spam, see chapter 1.6.5 Spam filter.
TIP
When you press the button together with the Shift key, you will return back to the message list.
Warning
Some of the buttons described above may miss if the message is opened in a folder where the user rights are limited (for details on folder access rights, see chapter 1.12 Folder Administration). In other words, the message that is read-only (e.g. in public folders) can be forwarded or replied to, but it cannot be deleted or marked as spam. These options are not displayed in the menu for the “read-only” messages.
TIP
In Settings (see chapter 2.5 User Settings) it is possible to enable opening of messages in a new window. This option is recommended especially for slower connections since messages are opened faster in a new window.
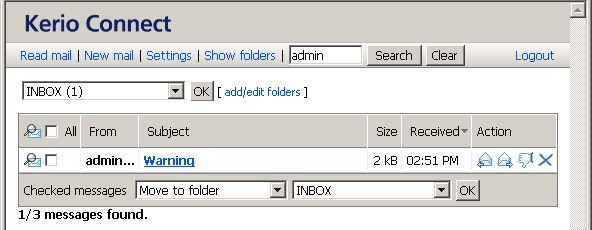
In Kerio WebMail Mini, two types of searching are available:
- Simple search
This type is available by simple typing the searched string in the entry on the toolbar. The search engine seeks the string in subjects and senders' addresses of the folder currently opened.
Simply enter a string to be looked up and click next to the text entry. All messages found are listed. Click to clear the search and view the entire list again.
- Advanced search
For advanced search, click on the toolbar (see figure 2.12 Advanced search filter). The following criteria can be used to filter out searched messages:
by subject,
by sender,
by addressee,
by size,
by date of reception,
by the fact whether the message includes any attachments,
by flag,
by priority,
by the fact whether the message was marked as spam.
Warning
Only messages that meet all criteria specified in the filter will be listed.
When the filter is ready, click Search.
- Search
All messages meeting the criteria will be listed upon clicking on the button.
- Close
The search filter will be hidden and the searching will be disabled.